Adding a Cable to a Library
A  Cable can be added to a Library in two different ways:
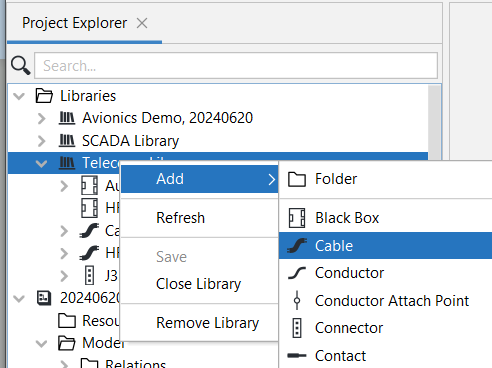
- Right-click the library or the folder in the library, click Add, Cable.
|
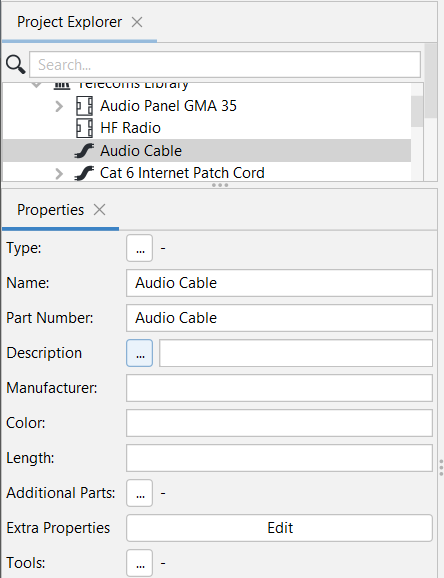
In the Properties Panel: a. Enter the Name. Most often the Name will be the Part Number. For that reason, Wiring Planner will automatically populate the Part Number field with the value entered in Name.
|
|
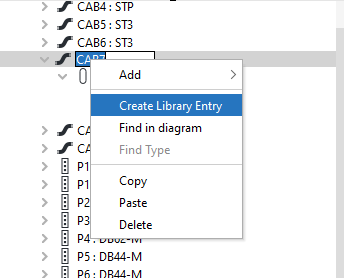
2. By creating a library entry from a cable that created in a Project.
|
In this example a new cable, CAB7 with the name "My New Cable", was created in a Project Model, for which there had not been a cable in any library. This new Cable can then be created in a library by right-clicking on it and selecting Create Library Entry:
|
If more than one library is open, you will be prompted to specify the library where the entry should be made. If only one library is open, the new entry will be made in that library. The Project Model element CAB7 will then be typed by the new library entry. Related Topics: Schematic Symbols in the Main Toolbar Editing and/or Extending a Library |
Notes:
- Cables are shown as a hierarchical list of sub-components.
 Conductors,
  Shields and
  Twists can be added to the cable by right-clicking it, clicking Add, then selecting the item to add
 - Shields may contain Twists and Conductors.
- Twists may only contain Conductors.